Natasha Siebert | June 03, 2014
Wedding Hair: Braided Headband Tutorial

Image by Madison Reed
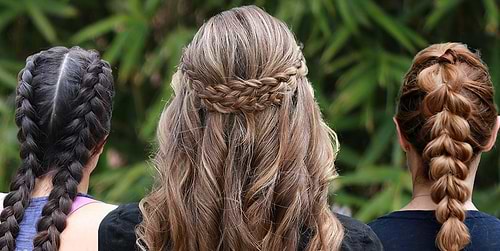
You voted on your favorite Simple Wedding Hair Photo, and the drumroll please… The Braided Headband. This style will look whimsical and sweet on your special day.
Here’s our step-by-step tutorial for this beautifully simple style– Our friend Jessica was able to do this style herself with some instruction from the professionals on our Color Crew. (Check out the written tips at the bottom of this post!)
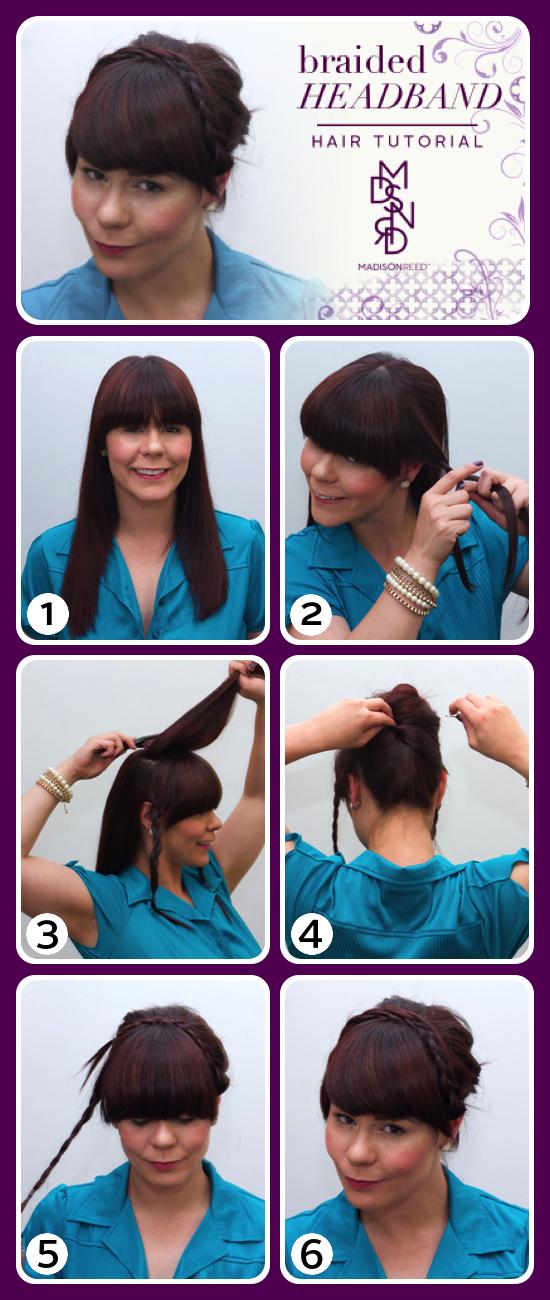
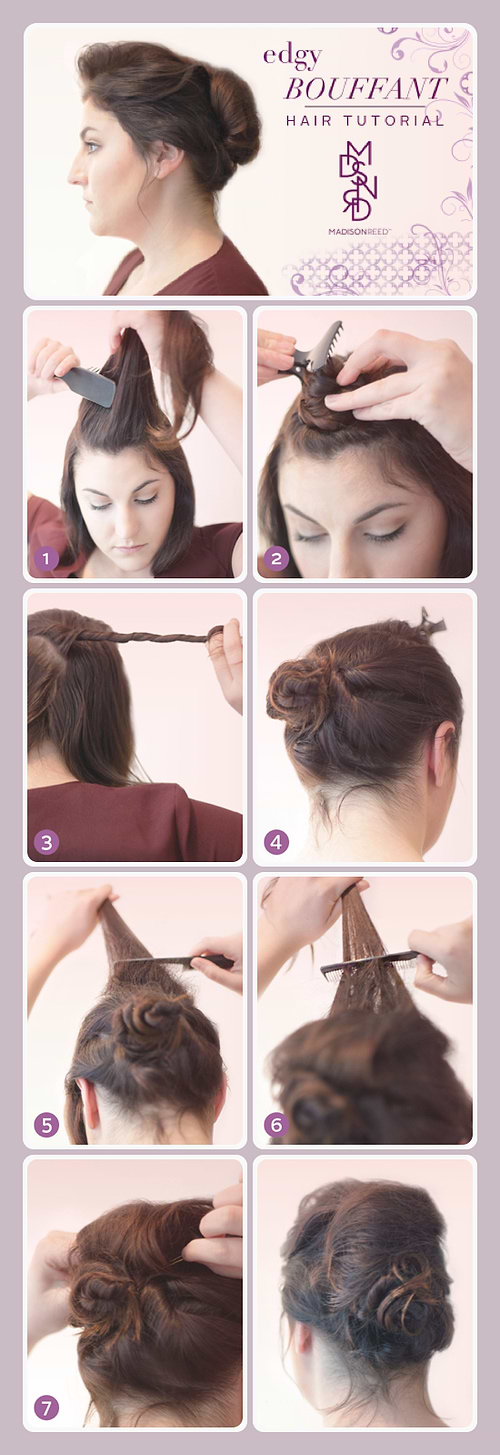
Braided Headband Tutorial
- Start with clean dry hair.
- Take a 3-inch vertical section above your ear along the temple. Braid the section and use a small clear hair elastic to secure it at the end. Repeat on the other side of your head.
- Take 2-inch by 1-inch sections on the top of your head and gently back-comb to get the most volume, do this until you reach the back of your crown.
- Smooth out the teased area on the top of your head, gather all your hair (excluding the braids) and twist into a bun, pin into place with bobby pins until you feel the bun is secure.
- Take up the first braid and secure it across the top of your head with bobby pins.
- Take the second braid, pull it across the top of your head and tuck the end into the first braid, hiding the ends. Use bobby pins to it into place. And voila! A simple, yet beautiful bridal style.
Photos by: Natasha Siebert
Find Your Perfect Shade
Take our 2 minute quiz to get your colorist-approved hair color match!
Take the quiz
Get Free Shipping
Plus exclusive promotions, hair tips and info about events near me when you subscribe!
Related Articles


previous
next
Trending Articles


previous
next